User Administration
Modifying your own profile
This section refers to modifying information about the current logged in user, including name, email address as well as resetting a password.

To modify your own profile first log into the application and then navigate to the Model Browser. In the upper right-hand corner is an avatar containing first letter of your username. Click the and select ‘Profile’ from the drop-down menu.
Administration of other users
This section refers to modifying information about any user account on the Modelshop server. Administrative rights are required to access these options.
To access the user management section, navigate to the Model Browser. In the upper right-hand corner is an avatar containing first letter of your username. Click the and select Administration from the drop-down menu. Once again, note that this option will only be available if the current logged in user has an Admin rights.
Creating new users
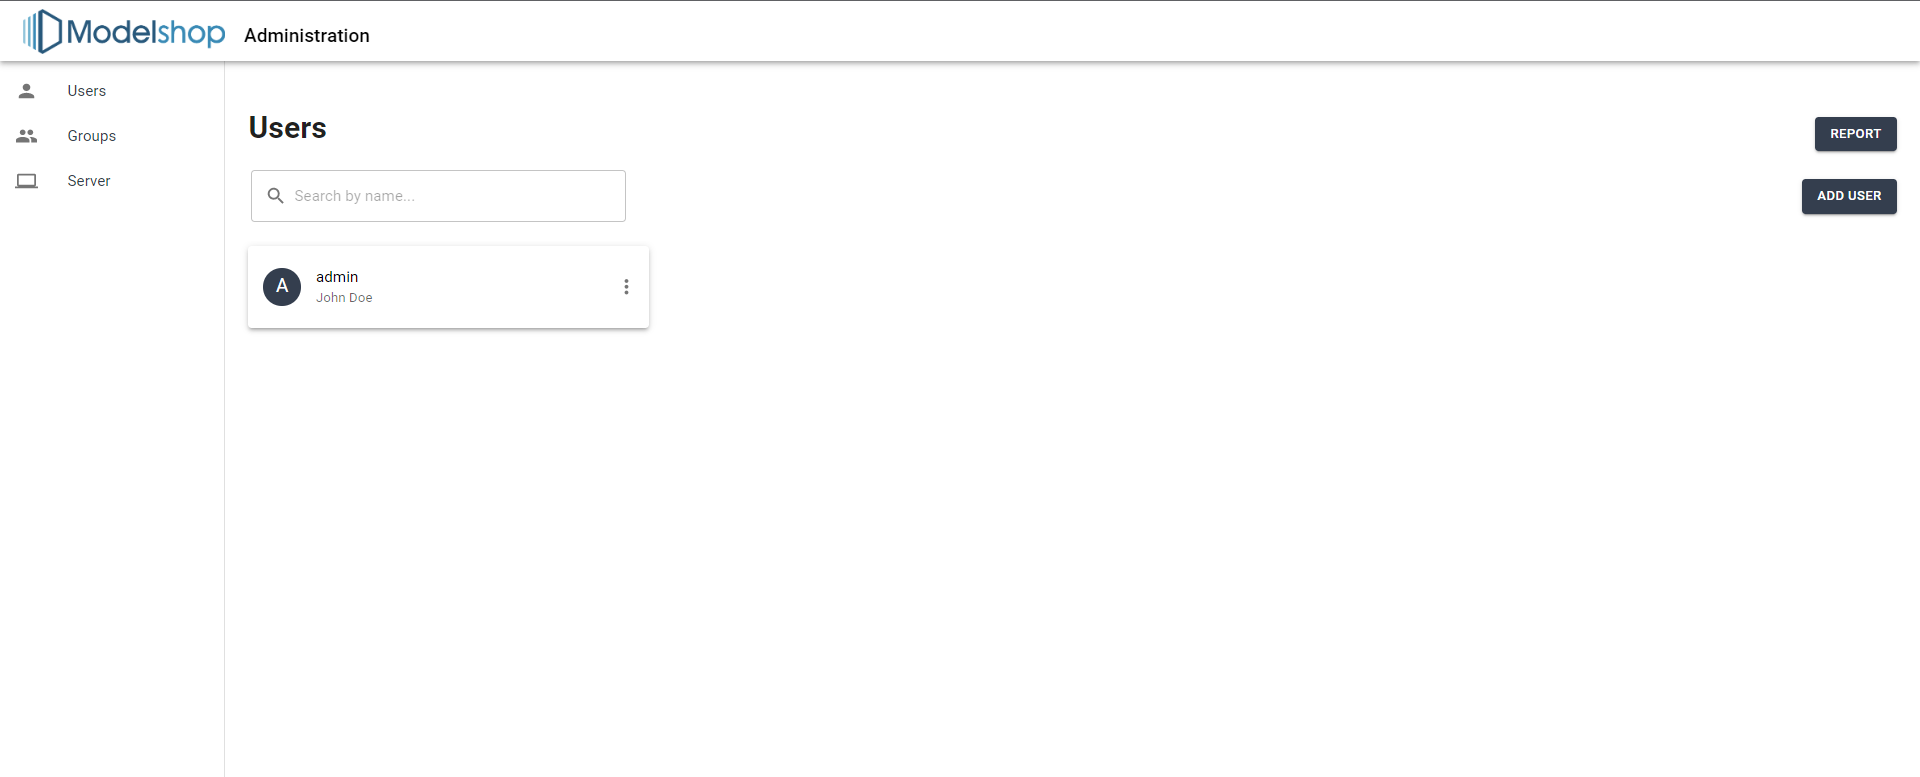
New users can be created by clicking on “Add User” in the top right of the Administration Screen. When creating a new user you may need to select a role for the new user. Options are:
Admin: An application administrator. This user will have full control to create, modify or delete user profiles as well as reset (but not view) passwords.
Host: A privileged user who is managing the server instance for other organizations - a host has elevated ability to see and be seen by users across organizations
Author: A user who has the rights to create, edit and share models
User: A normal user who can use models published and shared by an author
API: A programmatic user who will primarily be accessing Modelshop models through the API. These users are like regular users, with certain restrictions lifted, such as rate limiting or concurrent sessions limits.
Guest: A read only user. This user can have models shared with them for viewing, however a guest user cannot make changes or create new models.
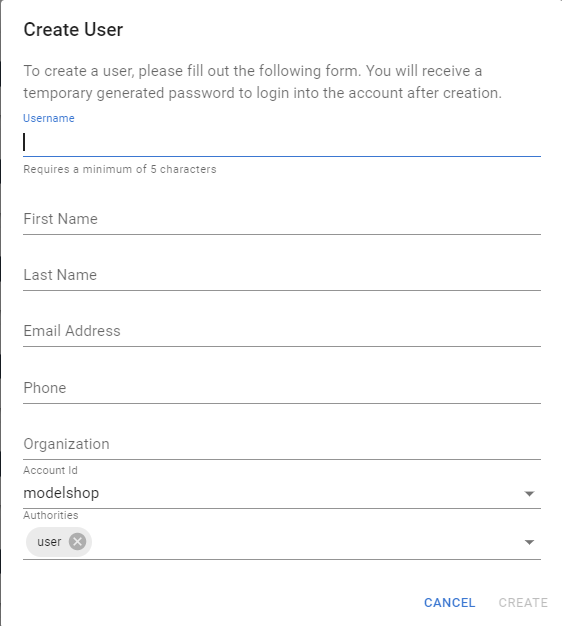
Upon saving the new user, a temporary password will be generated. The pop up will appear in the lower left hand corner of the Adminstration Screen. The new user can change their password to one of their preference when they first log in to Modelshop.
Alternatively, if a mail server is setup on the server (shared instances have this by default, private instances will need to be configured while installing Modelshop), users can create their own user accounts.
Modifying users
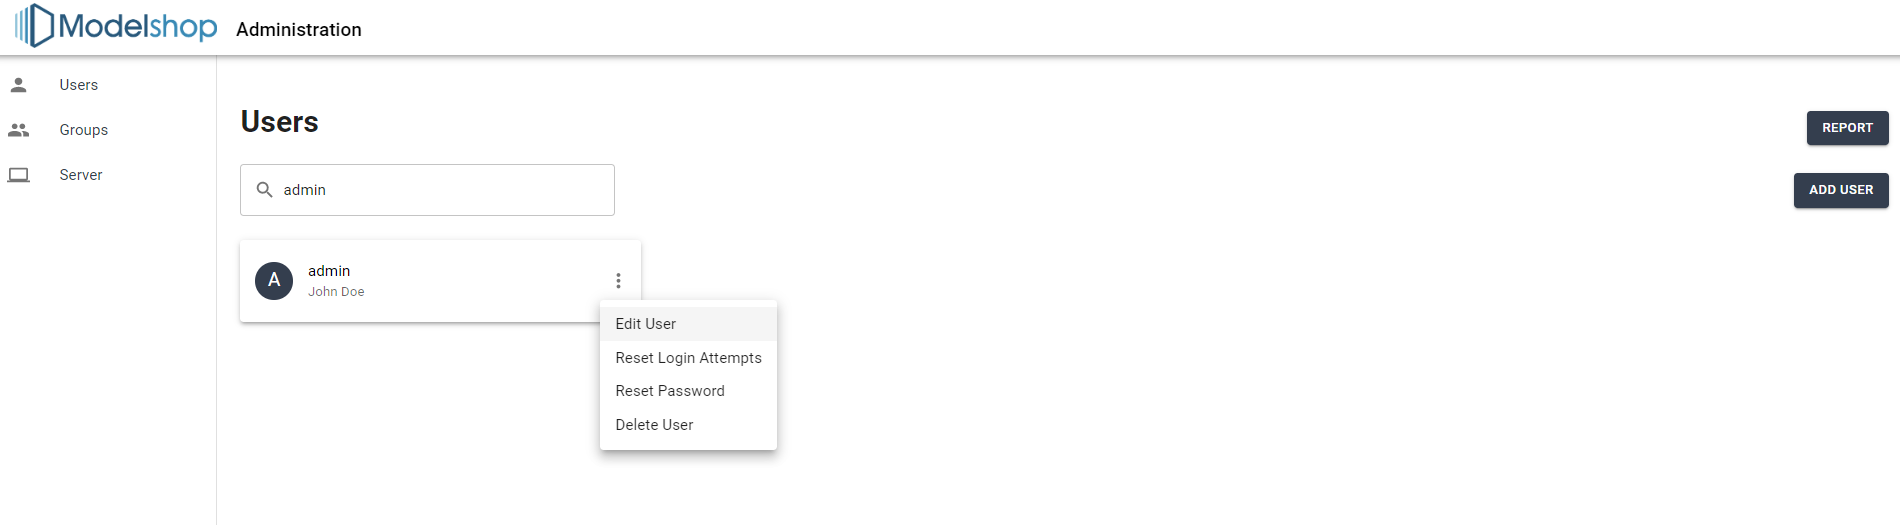
User profile information can also be modified by users with administrative rights. This is most often used for resetting a forgotten password or unfreezing an account after many failed login attempts. To modify a user, navigate to the Users tab in the Administration Screen. You can type in the search to quickly find the user you wish to update. Then click on the icon of three vertical dots, a menu will appear which has “Edit User”. You can then perform the necessary modifications and save.
In addition to password resets and login attempt resets, it is also useful to be able to delete user accounts.
To delete a user, find the user you would like to delete and click on the icon with three vertical dots. Find the menu option ‘Delete User’ and click to perform the action.
Groups
Groups are intended to allow bulk actions on a multiple users. The most common reason for using groups is shared models across many users. For instance, a certain division of a company, or a smaller team may want to share particular models with several users. Rather than sharing models with every user individually, a model can be shared with a group once, and then access to that model can be managed by adding or removing group members.
Create a group
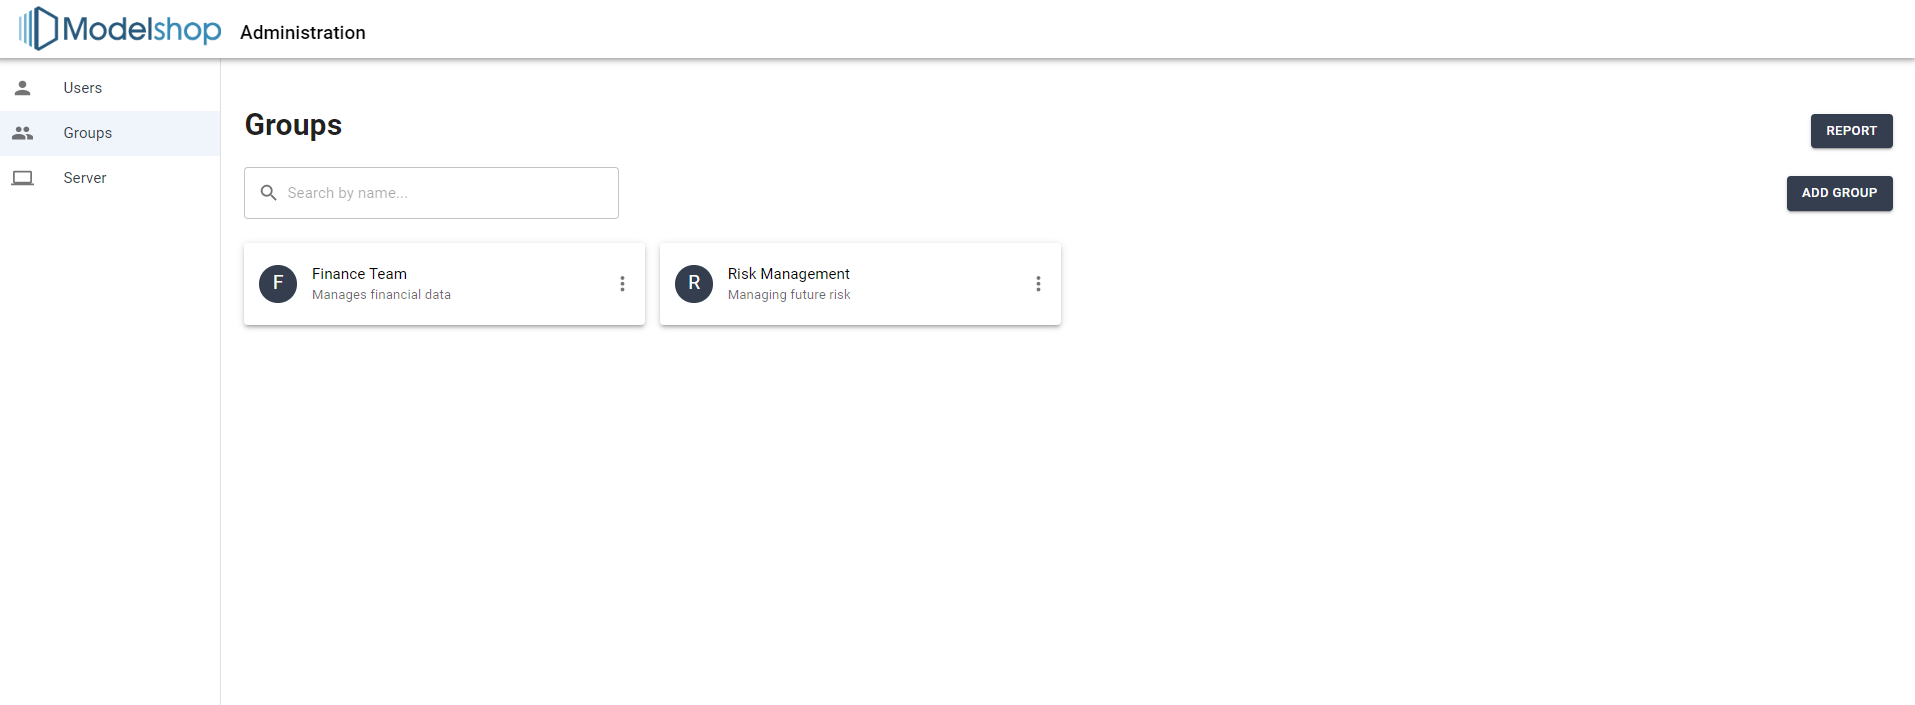
To create a new group, navigate to the Groups tab on the Administration Screen. Click on the button called ‘Add Group’ on the top right hand side of the Adminstration Screen. Enter the name of the group and select the users by clicking their usernames on the right hand side of the screen. Save the new group by selecting the save group button at the bottom of the form.

Modify a group
To edit an existing group, navigate to the Groups tab on the Administration Screen. Then select the group to be modified on by clicking on the three vertical dots icon. Find the menu option ‘Edit Group’ and click to perform the action. To add or remove a user, click the checkboxes on the right hand side of the dialog to add or remove users from the group.
User Roles Matrix
The following table provides an matrix of access levels based on the access level a user is given for a model and for system level access permissions. Models can be shared to the public (no login required), with users, with groups or with organizations. Each share can be done as READ (can see published data in the model), WRITE (can edit allowed editable data in the model), or EDIT (full access to the model structure and logic, can change logic or data).
Role for model or service |
Public |
Read |
Write |
Edit |
Owner |
Host |
Admin |
|---|---|---|---|---|---|---|---|
View Published Data |
X |
X |
X |
X |
X |
X |
X |
Write Published Data |
X |
X |
X |
X |
X |
||
Modify model logic |
X |
X |
X |
X |
|||
Delete model |
X |
X |
X |
||||
Share model inside organization |
X |
X |
X |
X |
|||
Share model outside organization |
X |
X |
|||||
Visibility to users outside org |
X |
X |
|||||
Manage users |
X |
||||||
Manage groups |
X |
||||||
Start/stop server |
X |
||||||
Administrative libraries/APIs |
X |
||||||
Linux commands under tomcat user |
X |
Server installation options impacting users
The following server settings will impact default user administration settings. Refer to the installation documentation for more information on how to leverage these features.
modelshop.users.allowNewRegistration
modelshop.users.registrationEmailFilter
modelshop.users.registrationDefaultAccount
modelshop.users.defaultAuthority